Testing construction materials
Contents |
[edit] Introduction
The testing of construction materials can be:
Testing may be necessary:
- As part of a quality control system.
- To verify that materials comply with the required specification.
- To achieve certification.
- To demonstrate compliance with legislative requirements, such as the building regulations.
Materials from suppliers will generally have been rigorously tested to the suppliers own standards, will generally comply with the minimum recommendations of the appropriate British Standards, and may have third party accreditation to demonstrate their quality.
Therefore, when they arrive on site, the usual tests that are required are those that check the quantity received against the amount stated on the delivery note, ensuring quality is as ordered, and a visual inspection so that any damage can be flagged up straight away.
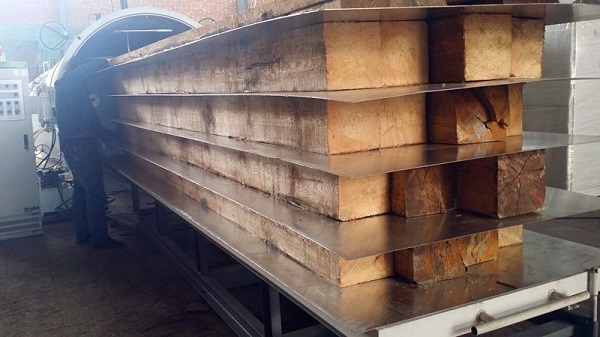
[edit] Testing timber
Timber can be tested on site for its moisture content. The moisture content is usually expressed as a percentage and calculated as the difference between the weight of the ‘wet’ timber and the weight of the same sample after drying. For example, the moisture content of a piece of timber weighing 500 g, and containing 250 g of water can be calculated as follows:
(Weight of wet timber - weight of dry timber) / Oven-dry weight x 100
(500 - 250) / 250 x 100 = 100%.
UK national product standards typically recommend that at the time of installation the moisture content should be:
- 18% in covered, generally unheated spaces.
- 15% in covered, generally heated spaces.
- 12% in internal conditions: in continuously heated buildings.
- 20% or more for external timber.
There are two common methods for measuring the moisture content:
[edit] Oven dry testing
This involves drying timber to a relatively constant weight in a ventilated oven at 102-105°C. It is possible to establish a very accurate original moisture content percentage (%MC) by drying a piece of timber in an oven for several hours, and testing it at regular intervals until its weight stops changing.
While this method is accurate, it is a slow process which can, if rushed, burn the timber or render it unusable because of deformations. It is also necessary to have the right kind of ventilated oven, which means it is impractical in many instances.
[edit] Using a moisture meter
Moisture meters for timber come in a variety of types but can be divided into two general categories by the method of measurement:
- Pin-type meters: These use two or more electrodes to measure the moisture content using electrical resistance. The more resistance to the electrical current the drier the timber, since water is a conductor and timber is a natural insulator.
- Pinless moisture meters: These pass an electromagnetic wave through a sample using a specialised scanning plate. It creates a reading of the average moisture content in the scanning area.
[edit] Testing bricks
There are several different ways to test bricks, including:
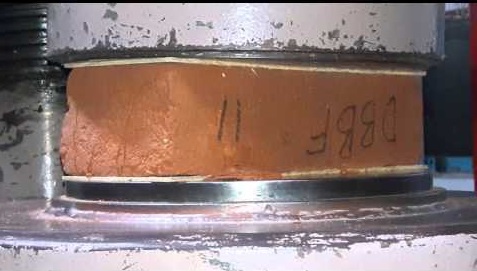
[edit] Compressive strength test
A sample brick is placed on a compression testing machine and pressure is applied until it fails. The ‘ultimate pressure’ level is recorded. Generally, five bricks are tested one at a time, with the average ultimate pressure level being taken as the compressive strength of the bricks.
[edit] Water absorption test
Bricks are weighed in their normal dry condition and then immersed in fresh water for 24 hours. They are then weighed again. The difference between the weights indicates the amount of water that has been absorbed by the brick. The less water is absorbed the greater the quality. The amount should not exceed 20% of the dry weight.
[edit] Efflorescense test
Efflorescence is a crystalline, salty deposit that can occur on the surfaces of bricks. It is generally a white or off-white colour with a powdery appearance. To test for alkalis that may cause efflorescense, a brick is immersed in fresh water for 24 hours and then left to dry.
If the whitish layer is not visible on the surface then it demonstrates an absence of alkalis in the brick. The ranges that should be followed are:
- About 10% of brick surface: Acceptable range.
- About 50% of brick surface: Moderate range.
- Over 50% of brick surface: Severely affected by alkalis.
[edit] Hardness test
The brick surface is scratched. If no impression is left then it is of good quality.
[edit] Size, shape and colour test
Twenty bricks chosen at random are stacked lengthwise, width-wise and height-wise, and inspected for uniformity of shape, size and colour.
[edit] Soundness test
Two bricks are held in each hand and struck together. They should not break and a clear metallic ringing sound should be made if they are good quality.
[edit] Structure test
A sample brick is broken and carefully inspected. If it is good quality there should be no flows, cracks or holes on the broken face.
[edit] Testing sand
[edit] Bulking test
Sand can be tested when batching concrete by volume. A damp sand sample is placed in a straight-sided container, filling to around two-thirds. A rule is inserted to measure the depth of the damp sand (e.g. 150 mm). The damp sand sample is then removed from the container and set aside. Clean water is poured to half fill the container. The sand is then placed in the water in two halves and tamped down with a rod to remove any air. The rule is inserted to measure the depth of the saturated sand (e.g. 124 mm).
The percentage of bulking can then be calculated as follows:
Bulking = difference in height between damp and saturated sand / depth of saturated sand
Bulking = (150 - 124) / 124 x 100 = 21%
Therefore, the volume of sand should be increased by 21% over that quoted in the specification.
[edit] Silt test
This test is used to measure the cleanliness of a sand sample by establishing the percentage of silt present. This is important as too much silt will weaken the concrete.
A salt water solution of 5 ml salt to 500 ml water is poured to 50 ml in a measuring cylinder. The sand sample is then added up to the 50 ml mark. More salt water solution is poured up to 150 ml before shaking the cylinder well.
The mixture should be left to stand for 3 hours before measuring the height of the silt which will have settled on top of the layer of sand. The height of the silt layer should not be more than 6 ml, or 6% of the sand sample height.
[edit] Testing concrete
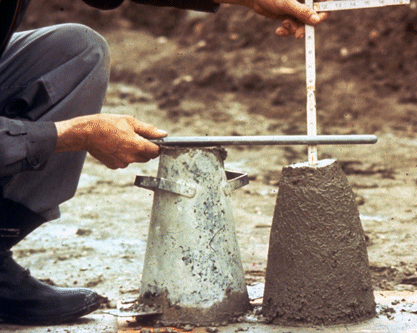
[edit] Slump test
This can be used to ensure that subsequent concrete mixes are of the same consistency.
A steel slump cone should be filled to a quarter depth and tamped 25 times with a tamping rod. The filling and tamping should be repeated three more times until the cone is full and the top levelled off. The cone is then removed and the resulting slump measured. If the mix is consistent, the slump should remain the same for all the samples that are tested. The usual slump specification is 50-75 mm.
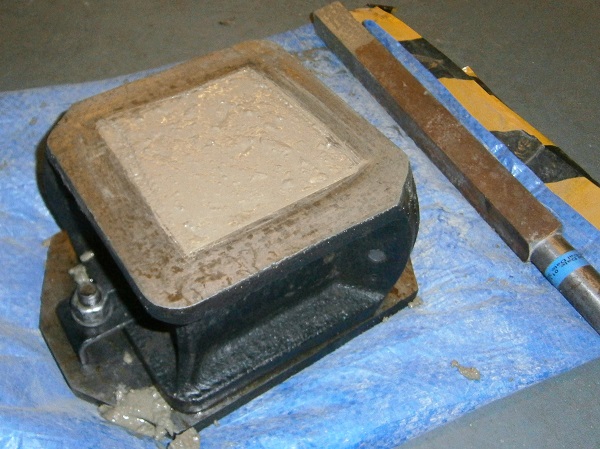
[edit] Test cubes
These can be made and crushed in a laboratory to check that the cured concrete has obtained the required design strength. A standard 150 x 150 x 150 mm steel test cube mould is used, thinly coated inside with mould oil. A concrete sample is taken from the discharge outlet of mixer or from the point of placing on site. The mould is filled in three equal layers (50 mm each), each layer being well tamped with at least 35 strokes.
The sample cube is covered with a damp sack or other covering and left for 24 hours at a temperature of 4.4-21°C. The sample is then removed from the mould and stored in water at a temperature 10-21°C until required for testing.
The cubes are generally tested at 7 and 28 days, using a calibrated compression machine. The cubes are tested on the face perpendicular to the casting face. A constant progressing force is exerted until the cubes fail. The reading at the failure is the maximum compressive strength of the concrete.
[edit] Rebound hammer test
A Schmidt hammer (also known as a Swiss or rebound hammer) is used to measure the elastic properties or strength of concrete. The varying surface densities will affect the impact and propagation of stress waves which can be recorded on a numerical scale known as rebound numbers. These rebound numbers can be graphically plotted to correspond with compressive strength.
[edit] Penetration test
Also known as the Windsor probe test, this is a measure of the penetration of a steel alloy rod, fired by a predetermined amount of energy, into a concrete sample. The depth of penetration is inversely proportional to the concrete’s compressive strength.
[edit] Pull out test
A number of circular bars of steel with enlarged ends are cast into a concrete sample. At the appropriate time, the bar and a piece of concrete are pulled out using a tension jack. Although the concrete fails in tension and shear, the pull out force can be correlated to the compressive strength of the concrete.
[edit] Vibration test
This uses an ultrasonic pulse to measure vibrations through a concrete sample. The readings can then be used to correlate compressive strength.
[edit] Related articles on Designing Buildings
- Blocked concrete delivery pumps.
- BTTG.
- Construction materials.
- Construction tolerances.
- Desktop study.
- Durability.
- Fit for purpose.
- Geophysical survey.
- Insitu testing of soils.
- In-situ reinforcement of timber beams.
- Manufacturer’s certificate.
- Materials on site.
- Pile integrity test.
- Predicting service life of timber structures.
- Opening up works for inspection and testing.
- Quality control.
- Testing pile foundations.
- The Construction Industry Council summarises what to expect from the Construction Products Regulations.
- Ultrasonic pipe testing.
[edit] External resources
- 'Building Construction Handbook' (6th ed.), CHUDLEY, R., GREENO, R., Butterworth-Heinemann (2006)
Featured articles and news
Homes England creates largest housing-led site in the North
Successful, 34 hectare land acquisition with the residential allocation now completed.
Scottish apprenticeship training proposals
General support although better accountability and transparency is sought.
The history of building regulations
A story of belated action in response to crisis.
Moisture, fire safety and emerging trends in living walls
How wet is your wall?
Current policy explained and newly published consultation by the UK and Welsh Governments.
British architecture 1919–39. Book review.
Conservation of listed prefabs in Moseley.
Energy industry calls for urgent reform.
Heritage staff wellbeing at work survey.
A five minute introduction.
50th Golden anniversary ECA Edmundson apprentice award
Showcasing the very best electrotechnical and engineering services for half a century.
Welsh government consults on HRBs and reg changes
Seeking feedback on a new regulatory regime and a broad range of issues.
CIOB Client Guide (2nd edition) March 2025
Free download covering statutory dutyholder roles under the Building Safety Act and much more.
Minister quizzed, as responsibility transfers to MHCLG and BSR publishes new building control guidance.
UK environmental regulations reform 2025
Amid wider new approaches to ensure regulators and regulation support growth.
BSRIA Statutory Compliance Inspection Checklist
BG80/2025 now significantly updated to include requirements related to important changes in legislation.


