The importance of welding assurance
Contents |
[edit] Introduction
Welding is termed a “special process”, i.e. a process where the conformity of the resulting product cannot be readily or economically verified.
What does this mean?
Simply that the compliance of fabricated items cannot be verified by simple inspection on delivery. Compliance of fabricated items can only be verified if evidence of compliance of all stages of the welding process can be demonstrated.
There are many examples on Projects where failure to be able to demonstrate that the welding process has been complied with has caused significant technical and programme issues.
This article outlines the various mandated welding assurance documentation that must be produced and approved prior to welding commencement, outlines the specified requirements and methodologies for the inspection of welds, provides guidance on what to look for when undertaking a welding surveillance, and briefly outlines some of the added complications of undertaking welding on site.
This article will not make you a competent welding expert, it is intended to highlight commonly experienced issues on the management of the welding assurance process.
[edit] Welding specifications
There are many specifications for welding but the two most common for building related fabrication in the UK are:
- The National Structural Steelwork Specification (NSSS) – currently the 6th edition
- BS EN 1090-2 : 2008 – Execution of steel structures and aluminium structures
As the NSSS is the most commonly used standard for construction fabrication, this article refers to the requirements of this standard. However, it should be noted that other fabrication standards, eg bridge fabrication, follow the same general process for welding assurance.
Note – The NSSS is written to comply with Execution Class 2 of BS EN 1090 : 2008 so the standards are to some extent linked.
[edit] Welding assurance documentation
The correct production and approval of these documents prior to the commencement of any fabrication is key to the welding assurance process. There are three types of documentation involved:
- Weld procedure specifications
- Weld procedure qualification records
- Welder qualification records
[edit] Weld procedure specification (WPS)
A WPS is a formal written document describing welding procedures which provides direction to the welder or welding operators for making sound and quality production welds as per the specified requirements.
Written WPSs shall be available in accordance with BS EN ISO 15609-1. Each WPS shall be qualified by testing in accordance with BS EN ISO 15614-1 or BS EN 15613. (NSSS Cls 5.3.1)
They shall be provided for the welder prior to the commencement of welding and shall be suitable for the joint configuration and material to be welded. These work instructions shall be made available to the employer, engineer or inspection authority on request (NSSS Cls 5.3.3)
[edit] Weld procedure qualification record (WPQR)
A WPQR is required to validate a WPS (or WPSs). A test piece is produced in accordance with the requirements of the WPS. The joint set up, welding and visual examination of the completed weld should be witnessed by an examining body. The details of the test such as the welding current, pre-heat etc., must be recorded during the test. Once the welding is complete the test piece must be subject to destructive and non-destructive examination such as radiography and mechanical tests as defined by the welding procedure standard.
WPQRs in accordance with BS EN ISO 15614-1 or BS EN 15613 shall be verified by the examiner or examining body. The responsible welding coordinator (RWC) may act as the examiner/examining body for the approval of welding procedures provided suitable competence can be demonstrated. (NSSS Cls 5.3.2). The qualifications of the fabricator’s RWC should be obtained. Some clients may not recognise the fabricator’s own internal RWC to act as the examining body, so a third party independent examination may also be required.
Range of approval is limited to materials with similar chemical composition and mechanical properties to that used in the WPQR. Welding is within a strict range of parameters for the essential variables recorded during the WPQR test. Several WPSs maybe qualified by one WPQR or vice versa.
[edit] Welder qualification record (WQR) (also sometimes referred to as welder qualification test certificate (WQTC))
The welder qualification test is carried out to demonstrate that the welder has the necessary skill to produce a satisfactory weld under the conditions used in production as detailed in the approved WPS.
Welders and welding operators shall be tested to meet the requirements of BS EN ISO 9606-1 (NSSS Cls 5.2.1.)
Testing of welders and welding operators shall be witnessed and certificates endorsed by a competent examiner or examining body (NSSS Cls 5.2.2.)
Range of approval, ie material type, thickness, welding position etc., is generally not as restrictive as WPQR testing with fewer essential variables as the main purpose of a WQR is to demonstrate the skill/ability of the welder. One WQR can cover many WPS’s.
[edit] Welding documentation approval
All welding documentation (welder qualifications, welding procedure qualification records, welding procedure specifications and associated work instructions) shall be reviewed for applicability by the person responsible for welding coordination (NSSS Cls 5.1). If requested, the documentation shall be made available to the inspection authority, if appointed. (NSSS Cls 5.1).
All welding documentation (welder qualifications, welding procedure qualification records, welding procedure qualifications and associated work instructions) shall be reviewed for applicability by the person responsible for welding coordination. If requested, the documentation shall be made available to the inspection authority, if appointed. (NSSS Cls 5.1)
All welding documentation must be accepted prior to commencement of the associated production welding.
It is essential that a suitably competent welding consultant (either in house or subcontracted) is employed to review and approve the fabricator’s welding documentation prior to fabrication commencing. This role can be fulfilled by the fabricator’s responsible welding co-ordinator, a position required by EN 1090.
There is an inter-relationship between WPSs, WPQRs and WQRs. They must all be accepted as individual documents. They must also be accepted as a suite of documents
The WPS must be qualified by an applicable WPQR.
A welder must hold a WQR applicable to the welding described in the WPS(s).
[edit] Inspection of completed welds
[edit] Visual inspection
100% visual inspection shall be carried out during welding and on completion to determine that the production quality is being maintained. Visual inspection shall be carried out in accordance with the guidelines given in Annex D (NSSS Cls 5.5.3).
A suitably qualified person for visual inspection of welds may be a welding inspector or a welder who can provide evidence of having been trained and assessed for competence in visual inspection of the relevant types of welds during and after welding (NSSS Cls 5.5.3).
[edit] Non-destructive testing
All welds will be subject to a level and type of non-destructive testing. The required rate and methods of testing will depend on the weld type and geometry and are detailed in Annex B, Table B of the NSSS. Additional non-destructive testing may be specified by the designer.
All non-destructive testing must be undertaken by a competent operator, normally PCN (Personnel certification in non-destructive testing) level 2 or similar. Competency must be relevant to the type of non-destructive testing being undertaken.
Where there is a risk of delayed cracking (caused by the presence of hydrogen in the weld and which may be an indication that the WPSs have not been followed) a period may be needed before the final inspection is made of as-welded fabrications. Recommended minimum hold times are given in Table A of Annex A.(NSSS Cls 5.5.4).
Four non-destructive testing methods are most commonly used. Each has advantages and disadvantages that will determine whether it is suitable for your particular testing application.
These techniques are:
[edit] Radiography
- Advantages - In radiographic testing, information is presented pictorially. A permanent record is provided, which can be viewed at a time and place distant from the test. This type of testing is useful for thin sections and is suitable for any material. Sensitivity is declared on each film.
- Disadvantages - Radiography is not suitable for several types of testing situations. For example, radiography is not usually used for surface defects or for automation, unless the system incorporates fluoroscopy with an image intensifier or other electronic aids. Radiography generally is not used for thick sections and the testing itself can pose a possible health hazard (site exclusion zones may be required).
[edit] Magnetic particle inspection
- Advantages - Magnetic particle inspection generally is simple to operate and apply. This testing is quantitative and it can be automated, apart from viewing.
- Disadvantages - This type of nondestructive testing is restricted to ferromagnetic materials, as well as to surface or near-surface flaws.
[edit] Dye penetrant testing
- Advantages - A quantitative analysis, dye penetrant testing is simple to do and is a good way to detect surface-breaking cracks in nonferrous metals where magnetic particle inspection cannot be used.
- Disadvantages - Dye penetrant testing is restricted to surface-breaking defects only. It is less sensitive than some other methods and uses a considerable amount of consumables.
[edit] Ultrasonic flaw detection
- Advantages - This type of testing can determine defect position, size and type. It is a portable type of testing that offers extreme sensitivity when required and can be fully automated. Access to only one side is necessary for testing, and no consumables are used.
- Disadvantages - No permanent record is available unless one of the more sophisticated test results and data collection systems is used. The operator can decide whether or not the test piece is defective while the test is in progress. Test indications require interpretation and a considerable degree of skill is necessary to get the most information from the test. Finally, ISO 17640 limits the test thickness to ≥ 8 mm so very thin sections can be difficult to test with this method.
[edit] Surveillance of welding operations at the fabricator’s works
When undertaking a surveillance of fabrication, some of the key things to verify are:
That the accepted WPS parameters are in use, ie that
- the correct welding process is being used,
- the correct weld consumables are being used,
- the correct joint fit up is being used,
- the correct material grades/thicknesses are being used
- etc.:
That the qualified welders are being utilised in accordance with the submitted WQRs;
That dimensional inspections, etc. are being undertaken and documented in accordance with the accepted inspection and test plan;
That all welds are subject to 100% visual inspection by a competent operative;
That welds have been subject to the required type/frequency of non-destructive testing (NSSS Annex B, Table B);
That the required hold times have been allowed prior to the undertaking of NDT (NSSS Annex A);
That the NDT has been undertaken by the submitted NDT company/competent operatives.
[edit] Site welding assurance
Site welding is more problematic than shop welding and should be avoided if possible.
Things to look for during site welding:-
Welding process – this may well be different from that used in the fabrication shop, ie manual metal arc welding using a rod consumable is often used on site where metal active gas (MAG) or metal inert gas (MIG) welding that use wire consumables are used more often in the works. If so a new set of WPSs/WPQRs and WQRs will be required as the welding process is different.
Weld consumable maintenance – rod consumables must either be preheated prior to use or can be purchased in vacuum packs that must be used the day they are opened (this is to prevent moisture affecting the welding process).
Environmental considerations – loss of temperature, moisture, humidity, wind, etc. can affect the welding process and must be controlled, i.e. by encapsulation.
The author would like to thank Julian French, Partner, Sandberg LLP for checking the article for technical correctness.
Original article written by Jon Elliott on behalf of the CQI Construction special interest group, reviewed by members of the CQI CoSIG Competency working group and approved for publication on 23 October 2018.
--ConSIG CWG 14:58, 05 Jan 2019 (BST)
[edit] Related articles on Designing Buildings Wiki
Featured articles and news
Homes England creates largest housing-led site in the North
Successful, 34 hectare land acquisition with the residential allocation now completed.
Scottish apprenticeship training proposals
General support although better accountability and transparency is sought.
The history of building regulations
A story of belated action in response to crisis.
Moisture, fire safety and emerging trends in living walls
How wet is your wall?
Current policy explained and newly published consultation by the UK and Welsh Governments.
British architecture 1919–39. Book review.
Conservation of listed prefabs in Moseley.
Energy industry calls for urgent reform.
Heritage staff wellbeing at work survey.
A five minute introduction.
50th Golden anniversary ECA Edmundson apprentice award
Showcasing the very best electrotechnical and engineering services for half a century.
Welsh government consults on HRBs and reg changes
Seeking feedback on a new regulatory regime and a broad range of issues.
CIOB Client Guide (2nd edition) March 2025
Free download covering statutory dutyholder roles under the Building Safety Act and much more.
Minister quizzed, as responsibility transfers to MHCLG and BSR publishes new building control guidance.
UK environmental regulations reform 2025
Amid wider new approaches to ensure regulators and regulation support growth.
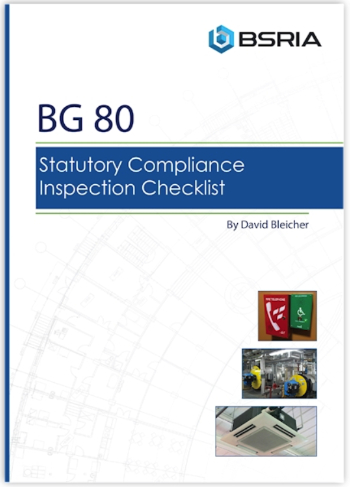
BSRIA Statutory Compliance Inspection Checklist
BG80/2025 now significantly updated to include requirements related to important changes in legislation.


