


Measurement of existing buildings
Contents |
[edit] Equipment
Some of the items that are often used for building measurement include:
- Clipboard.
- Paper.
- Pens and pencils.
- Laser measure.
- Tape measure.
- Camera.
- Voice recorder.
- Digital recording device such as a tablet.
- Personal protective equipment (PPE).
NB: Devices and software are available to assist with surveys, allowing sketches, notes, photographs, and so on, to be recorded and linked.
[edit] Before survey
It is helpful before undertaking a survey, to do some preliminary investigation into the building as a means of gaining familiarity with it. OS maps and Google Maps can help provide some idea of the building’s locality in relation to its surrounding geography, the building’s shape, orientation, and so on. There may also be existing drawings that can be used as the basis of the survey, and the client, or occupant may be able to provide important information, such as whether the building is safe, whether it will be possible to access all areas, and so on.
It is important to formally agree the extent of the measurement that is required. For example, only simple layouts may be required, or more detailed drawings of plans, elevations and sections, including positions of fixtures, fittings, switches, sockets and so on. In some cases, the intention may be to create a three-dimensional model. Historic buildings in particular can include intricate details and may not be entirely rectilinear - if this level of detail is required, it can be extremely time consuming.
If it is not clear the level of information that is required, repeat visits may be necessary and this can be both time consuming and expensive. If mistakes are made, this can also prove extremely problematic - for example, if a space is measured and then relied upon for the fabrication of a staircase to go into the space, and then the staircase does not fit. In such cases, it can be wise for the fabricator to be told to take their own measurements. In any case, survey drawings should make clear the purposes for which they can be relied, for example, 'not for construction'.
Photography may be used to supplement the measurements and provide a record that can be referred back to. In some cases, laser scanning may be undertaken.
[edit] Survey process
Walk around the entire building first, before beginning the measurement, as this will provide an important initial understanding of the layout.
It can be helpful, depending on the building’s size, to divide it into sections, drawing out each roughly at a large enough scale to add the dimensions comfortably. The building can either be measured one section at a time, or all in one go when all the drawings are done.
Where more intricate details are required, these may be drawn separately.
Measuring typically starts in one corner of the room, before proceeding around in either a clockwise or anti-clockwise direction. To assist with general accuracy, some measurements diagonally across the room should also be taken to verify that walls are parallel and corners are ninety degrees.
Where possible, running measurements should be taken rather than a series of single measurements. That is, for example, measurements are noted from a corner to a door, then from the same corner to the other side of the door, then from the same corner to the far corner. This prevents cumulative errors building up if single measurements are taken then added together.
[edit] Triangulation
Triangulation is used to measure the angles between features, as it cannot always be assumed that they will be exactly 90-degrees. A point on one wall is measured to the corner. Another point on the adjoining wall is measured to the same corner. Then a measurement is taken of the distance from one point to the other. This provides measurements for the three sides of the triangle, from which the angle can be calculated.
[edit] Heights
Heights from floor to ceiling should be measured, along with floor and wall thicknesses. To measure a roof height externally, measure a floor to the underside of the eaves. If there is a uniform façade (i.e. bricks, regular stonework, blockwork, etc.), then it is possible to calculate distances by counting the bricks/blocks and multiplying them by the length or height of the brick/block - not forgetting to add on the width of joints.
[edit] Floor thicknesses
To measure floor thicknesses, measure the distance from the window head to the ceiling height on the ground floor. Then, on the floor above, measure the distance from window cill to the floor. This provides an overall distance. Outside the building, measure the distance between the ground floor window head and the first floor window cill. Subtracting the internal measurement from the external measurement provides the floor thickness.
[edit] Variations in ground level
To represent variations in ground level, a constant feature on the elevation should be identified (such as a window cill), and from ground to this point measured around the building.
[edit] Annotation
There are a number of standard symbols and notations that can be used to speed up the process of surveying.
See Symbols on architectural drawings and Notation and units on drawings and documents for more information.
[edit] Clarity
Complex buildings can require a great number of measurements are taken, and this can be confusing later when trying to interpret what has been recorded.
At the most simple level, it is important that it is clear what distance a particular measurement refers to. This is generally done by drawing a line with a diagonal cross at each end showing the extent of the measurement.
Using colour-coding to reference the different measurements (e.g. one colour for general drawing and measurements, one colour for heights and levels, and so on), can save time and confusion when later trying to decipher the various numbers on the drawings.
Taking photographs of each room/area can be useful later for checking purposes.
[edit] Related articles on Designing Buildings
Featured articles and news
Cyber Security in the Built Environment

Protecting projects, data, and digital assets: CIOB Academy.

The UK's campaign to reduce noise pollution: Mythbusting, articles and topic guides.
Setting Expectations on Competence Management

Industry Competence Committee.
New Scottish and Welsh governments

CIOB stresses importance of construction after new parliament elections.
The sad story of Derby Hippodrome
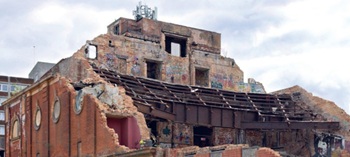
An historic building left to decay.

ECA, JIB and JTL back Fabian Society call to invest in skills for a stronger built environment workforce.

Women's Contributions to the Built Environment.
Calls for the delayed Circular Economy Strategy

Over 50 leading businesses, trade associations and professional bodies, including CIAT, and UKGBC sign open letter.
The future workforce: culture change and skill

Under the spotlight at UK Construction Week London.
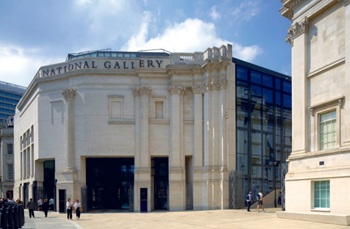
A landmark moment for postmodern heritage.
A safe energy transition – ECA launches a new Charter

Practical policy actions to speed up low carbon adoption while maintaining installation safety and competency.
Frank Duffy: Researcher and Practitioner

Reflections on achievements and relevance to the wider research and practice communities.
The 2026 Compliance Landscape: Fire doors
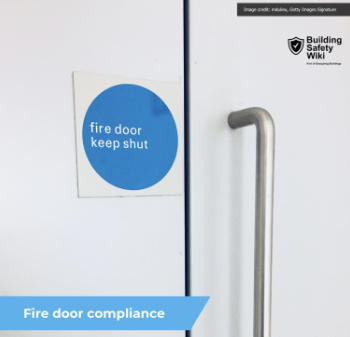
Why 'Business as Usual' is a Liability.
Cutting construction carbon footprint by caring for soil

Is construction neglecting one of the planet’s most powerful carbon stores and one of our greatest natural climate allies.
ARCHITECTURE: How's it progressing?
Archiblogger posing questions of a historical and contextual nature.