


How to lay block paving

Contents |
[edit] Introduction
Block paving, or brick paving, is commonly used for constructing pavements, patios, driveways and so on. It is may be used due to its decorative aesthetic, ease of installation, and the fact that the bricks or blocks allow for easy remedial work by removing and replacing those that are necessary.
Block paving can be used to achieve many different laying patterns, the most common being the herringbone pattern due to its interlocking strength.
Block paving is a very popular choice for domestic driveways and this article will explain the various stages involved for this particular application (although other applications are very similar).
The SuDS Manual published by CIRIA in 2015 defines block paving as: ‘Paving designed to allow rainwater falling onto the surface or runoff discharged over the surface to infiltrate through the joints or voids between the blocks into the underlying pavement structure.’
[edit] Excavation
The first stage, once the area required for block paving has been established, is to excavate to a depth that means the finished surface of the blockwork will be at least 150 mm below the damp-proof course of the adjacent building to the paving (and that it drains away from teh building). The typical excavation depth is 200-250 mm below the finished paving level (this comprises 100-150 mm sub-base, 40 mm sand bed and 50 mm block or brick).
The ground should be excavated to a gradual slope to allow surface water to run away and not pool on the surface. If a drainage system is to be installed, the slope can be directed towards that. The typical slope is a 1 cm drop for every 60 cm length.
A skip may need to be hired to remove the excavated material. The amount of excavated material needing to be removed can be calculated by multiplying the surface area by the dig depth, as well as accounting for 20-30% extra for the bulking-up of the spoil material.
[edit] Edge restraints
Edge restraints are required to frame the block paving. First, string lines should be set up as guides to level the edge courses and kerbs.
The edge course bricks and kerbs should be laid on a concrete foundation using a mortar bed, and hammered in gently, checking the line for the correct level. This edging should then be haunched by applying concrete to the outside up to approximately halfway (roughly 75 mm thick).
At this stage, any drainage should be installed and also haunched with concrete to protect it.
[edit] Sub-base and screeding
The sub-base layer should be a minimum of 100 mm-thick and firmed down using a compacting plate. Making sure the sub-base material is compacted provides a level and strong base for the block paving.
Coarse sand should be spread and levelled on top of the sub-base layer to roughly 25-40 mm deep. It should then be screeded to ensure a smooth and even surface on which the paving can be laid.
[edit] Laying the blocks
Blocks should be laid from one corner at the bottom of the slope. They should be around 10-15 mm above the measured line as this then allows for compacting once they are all in place.
The herringbone pattern provides the strongest interlocking bond and is achieved by setting the blocks at either 45- or 90-degrees to the perpendicular. Those laying the blocks should always work from the paving that has been laid, not the screeded laying course.
Once all laid, the blocks should be carefully checked for alignment by stretching a string line along the diagonal courses. Concrete blocks tend to drift less than clay pavers which can require re-adjustment.
The edges of the paving can then be cut in to fit snug to the edge course. Recess trays and gully covers should be fixed in place if required for drainage,.
[edit] Jointing and finishing
Jointing involves spreading kiln-dried sand over the surface of the block paving and sweeping this into the joints. This can be done whilst compacting the paving down using a compactor plate. Care should be taken to alternately pass over each section of paving at 90-degrees to the previous pass.
Jointing sand may settle over the first few weeks of the block paving being completed, and should be topped up as necessary.
Sealant can be applied to minimise staining.
[edit] Related articles on Designing Buildings Wiki
Featured articles and news
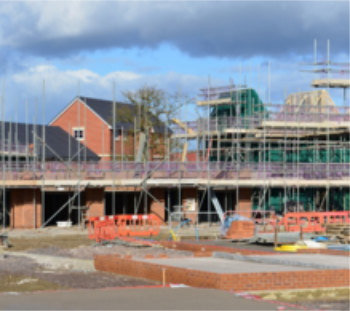
Costs and insolvencies mount for SMEs, despite growth
Construction sector under insolvency and wage bill pressure in part linked to National Insurance, says report.
The place for vitrified clay pipes in modern infrastructure
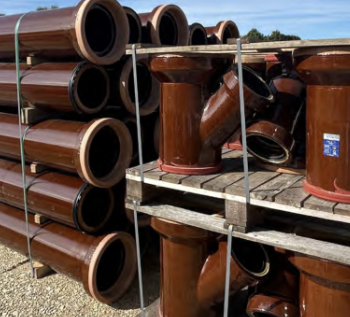
Why vitrified clay pipes are reclaiming their role in built projects.

Research by construction PR consultancy LMC published.
Roles and responsibilities of domestic clients

ACA Safety in Construction guide for domestic clients.
Fire door compliance in UK commercial buildings
![]()
Architect and manufacturer gives their low down.
Plumbing and heating for sustainability in new properties

Technical Engineer runs through changes in regulations, innovations in materials, and product systems.
Awareness of the Carbon Border Adjustment Mechanism

What CBAM is and what to do about it.
The new towns and strategic environmental assessments
12 locations of the New Towns Taskforce reduced to 7 within the new towns draft programme and open consultation.

Buildings that changed the future of architecture. Book review.
The Sustainability Pathfinder© Handbook
Built environment agency launches free Pathfinder© tool to help businesses progress sustainability strategies.

Government outcome to the late payment consultation, ECA reacts.
IHBC 2025 Gus Astley Student Award winners
![]()
Work on the role of hewing in UK historic conservation a win for Jack Parker of Oxford Brookes University.
Future Homes Building Standards and plug-in solar

Parts F and L amendments, the availability of solar panels and industry responses.
How later living housing can help solve the housing crisis
Unlocking homes, unlocking lives.
Preparing safety case reports for HRBs under the BSA

A new practical guide to preparing structural inputs for safety cases and safety case reports published by IStructE.
Male construction workers and prostate cancer

CIOB and Prostate Cancer UK encourage awareness of prostate cancer risks, and what to do about it.
Comments
This is a great article and very well written. Covers off on all the key stages and considerations from planning to execution to finishing. Articles like these are very useful for the DIYers among us. The key element of any driveway or external surface installation around your home is the drainage. Just make sure that this is well thought through during the planning phase and that you adopt the relevant permeable materials to ensure that it is self-draining on to your property and that it is SUDS compliant. Thanks for the article.